


Chiaroscuro
A.K.A. Project Orion
PS4 Targeted Couch Co-op Puzzle Platformer
Timespan: November 2015 - May 2016
Role: Designer and Prototype Programmer
Tools and Languages: Unity 5.x, C#, Custom Tool
Project Overview
Chiarascuro (AKA Project Orion) is a 3D cooperative puzzle platforming game for two people. It’s focus on codependency ensures players must work to together to progress. Mechanically, this means one person embodies and manipulates the environment and the other traverses it. Thematically, the game is about interpersonal interaction and how some things are impossible to accomplish alone.
Project Orion began as a desire to make a game completely from the ground up for the PlayStation 4. When we started working our team had 13 people, overseen by Jessica Bayliss, the Associate Director of the school of Interactive Games and Media. Within this team, I functioned as a designer/technical designer: creating mechanics, programming and scripting, and doing grey-boxing and level design both in Unity and a custom tool. In addition, I worked with both engine level programmers and artists to determine the art style and graphical effects.
Early Prototyping
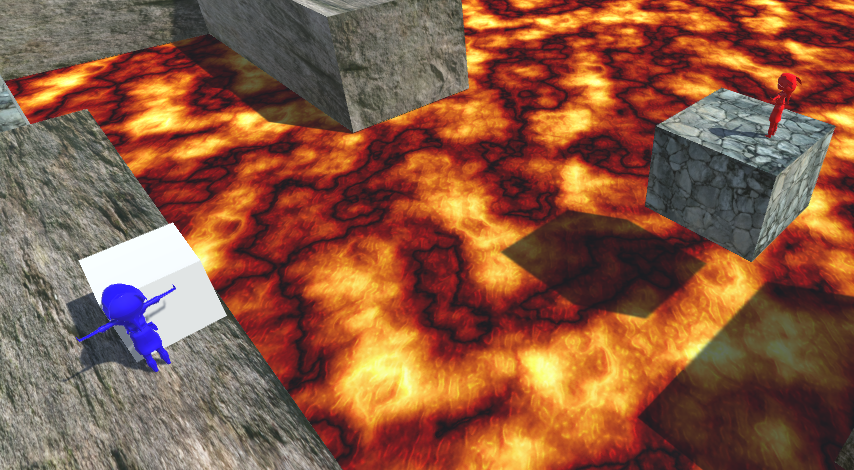
Early prototyping and proof of concept began before our official start date in January. Unity Engine was used to assist in rapid development of levels and grey-boxes, as well as quick iterations between playtests. Much of our earlier designs used design philosophy centered around children’s games, such as leapfrog and “the floor is lava”. This resulted in pure experiences, and assisted in creating elegant puzzles for our players.
The pictures and video below are of a couple of early prototypes. (In the video, you’ll hear the name Jesse, referring to our Level Design professor who agreed to let us work on Orion for his class in November. My co-narrator is Sam Handrick.)
Working With Artists
We were lucky enough to have a large team of artists assisting us in the development of Chiaroscuro. This was my first time working with artists, and it was a valuable experience. Because I am not an artist myself, I was largely unfamiliar with the process of creating artwork for a 3D game. I had done some modelling and texturing before, but this was much more in depth. To begin with we created what they called an “asset bible” to clarify language, create a cohesive aesthetic, and guide the production process. Using it, we proceeded to the concept art stage. Many character designs and hundreds of smaller asset concepts were created, which we whittled down to only those we thought were necessary.
Below you’ll see some of the concept art.
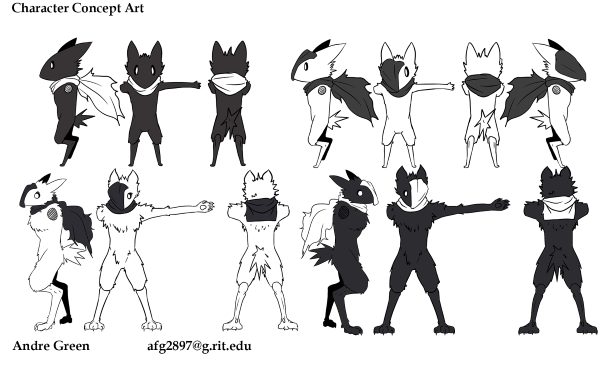


Approved concepts were separated out and worked on in stages, and each stage needed approval from us in design to move on to the next. The stages were models, texturing, and final polish. In addition, character models required animation approval. The artists were very responsive to feedback and had valuable opinions throughout the process. Working with them in a deadline driven environment was an incredible experience.
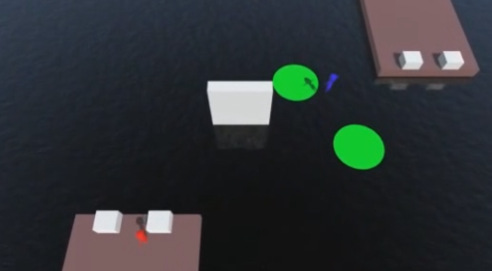
Later Unity Prototypes
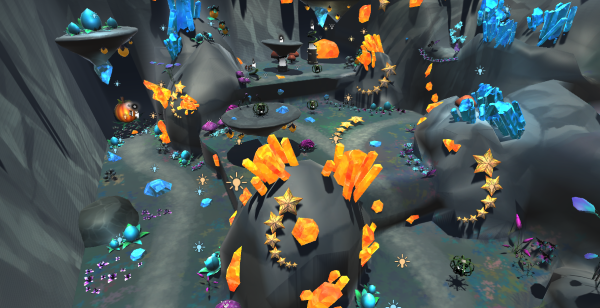
Later prototypes were also created in Unity, allowing us to continue our iteration speed and receive feedback as quickly as possible. When we received the final versions of art, it was easy to place it in the scene and continue working. Overall, it was very conducive in helping us rapidly test mechanics and level designs.
Below is the Final Prototype with art.

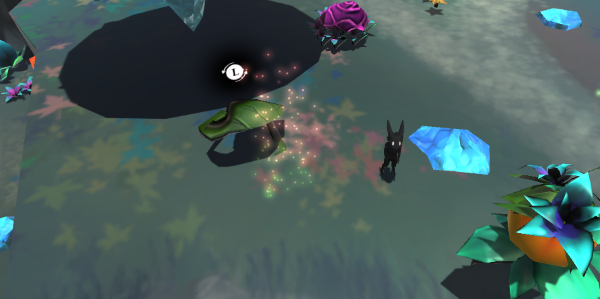
Because of the nature of our agreement with Sony and the timeline of our production, we could not test using our PS4 versions of the game. Instead we used the Unity prototypes when playtesting. We used a combination of in person interviews and anonymous google form questions to get the most accurate responses we could.
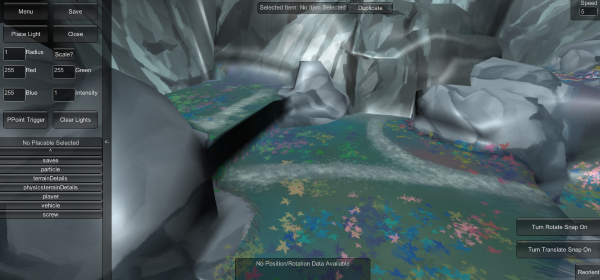
Using Custom Tools
To bring our designs and art into our custom engine, we used a tool created by our wonderful team. The tool allowed us to place and remove items within a scene, save it, then export it to a file to be read by the engine. Once the engine had it to render, that was it! Unfortunately our timeline was very strict, and extensive use of the tool was not possible, but while I had it, it was a joy to work with, and hands down made the process faster and smoother.
The Final Product
Unfortunately, our agreement with Sony does not allow me to show footage from the PlayStation 4, which had all of our graphical features. What I can show is a video made and rendered in Maya using the same models and textures seen in the Unity engine.
This video is hosted on Joshua Landman's YouTube Profile. Please watch it: HERE
What I Learned
- Design must be at least 2 weeks ahead of the rest of development. Tools as well. Without the foundation and groundwork well ahead of everything else, there is no room to change things without holding up production, and things can get messy.
- Everyone’s voice is equally important. Just because you find yourself in a role does not mean someone else can’t have a good idea. Furthermore, everyone likes to see their influence in their work. And a happy team is a productive team.
- Personal time is not just important, it’s required. If you don’t take time out for yourself, you can end up burnt out and less productive than just taking a nap or going out with your friends for a while. We all experienced this multiple times with this project.
- Meetings are wonderful, and awful. We had weekly meetings as a team and in groups, as well as other separate one-on-one meetings. While these took a large portion of our production time, they aided us in communication and project clarity
The Full Credits
Engine Programming and Tools
Design and Prototyping
- Joel Tom
- Sam Handrick
- And Myself!
Art and Animation
Constellations
A Card Game About Perspective
Timespan: November 2015 Onward (5 Weeks + On and Off)
Role: Lead Designer, Developer, and Card Scripter
Tools and Languages: Photoshop, Excel, Squib (Ruby Gem), Ruby, YAML
Project Overview
Constellations is a card game where you meet three goals simultaneously by playing or removing star cards in front of yourself or your friends. The goal cards represent the position of the players. The left goal card corresponds to the player on your left, middle to you, and the right goal to the player on your right. To meet the goals, you must match the number and color of the stars in front of those players with those stated on the goal cards. The three goals are the same for each player. When stars are played, each player counts them toward their goal total, creating a unique system where each player is trying to manipulate adjacent player’s boards as well as their own, in addition to stopping others from doing the same.
This began as a project for a class in which we had to make an analog game in 5 weeks. The team was four people including myself. I was the lead designer on the project, creating cards and making rules as fast as possible. I then used them in playtests both internal and external and adapted them with the feedback I received. Later in the project, I became the sole member, and I worked with a Ruby Gem called Squib, which combined Excel, Ruby, and YAML to create cards programatically.
The Prototype
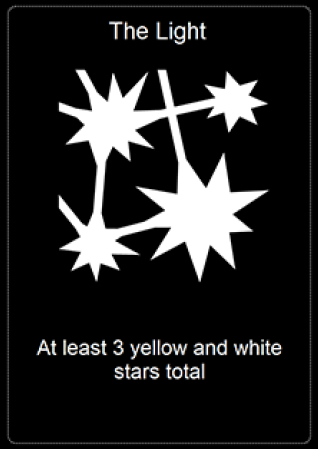
Initial work began using Google Sheets and handmade index cards. This allowed us to test quickly, and just as quickly change card rules and wording. After every test, we would meet and talk about what we learned and edit rules and cards as necessary. There were three types of cards: Goal cards, Action cards, and Star cards.
- Goal cards have the win condition for the game. They were originally one card with multiple goals on them, but I changed this later.
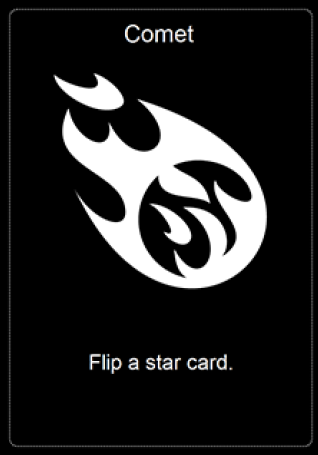
- Action cards have effects that allow players to manipulate the field’s stars. These have proven to be the meat of design work, but their dynamic nature makes the game fun.
- Star cards allow you to meet goals and foil other’s plans. They are the objects that allow you to win.


We managed to get a great deal done with index cards, but we often received feedback about the lack of art, and how it could make cards more recognizable. This led us to our next major iteration.
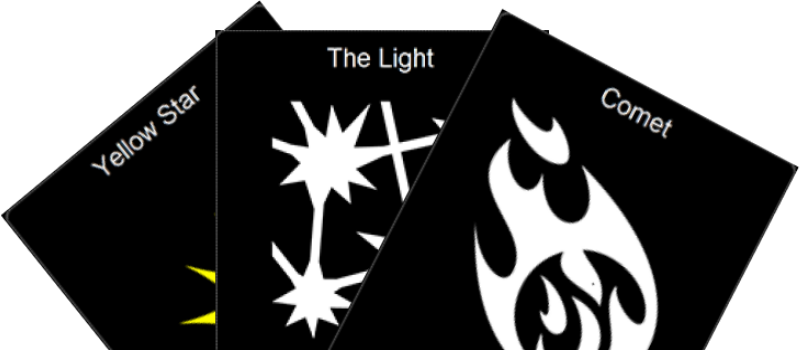
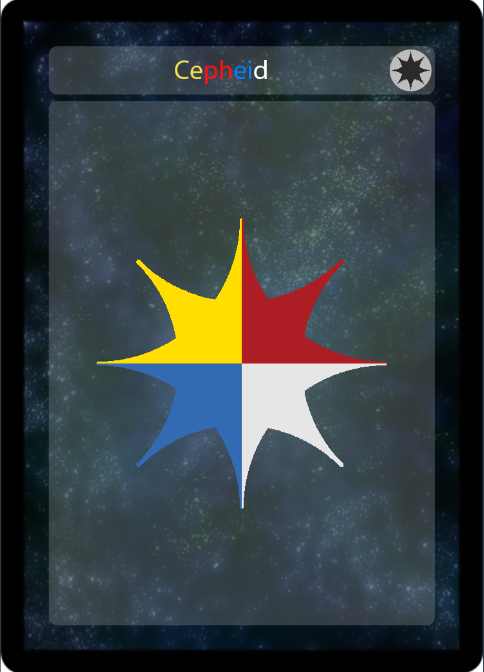
The Second Iteration
We set to work on making card art so that our players could focus more on the mechanics of the game. Our card designs were heavily influenced by Magic the Gathering. We felt the symbology used could be adapted for use in our game, and the result was quite successful. With the introduction of art, we saw decreased playtimes, less reading aloud, and increased overall playability. It also brought to light some of the less evident issues with some of the action cards, and allowed us fix them.


This iteration of cards was the culmination of 5 weeks of work and was a wonderful stopping point for our group. I enjoyed working with every member of the team, and their contributions were invaluable. I’ve put the rules for this iteration below.
Download Rules V1
The Third Iteration
After the 5-week deadline was up I wanted to continue working on it, but understandably, the rest of my group moved on to other projects. Without their help, I needed a way to make cards just as quickly. I sought assistance from my design professor, Eloise Oyzon, and she pointed me to something called Squib. Squib is a Ruby gem that relies on YAML to create card layouts, and uses data from Excel spreadsheets to populate card data. I didn’t know Ruby or YAML before this, but I took the challenge and learned Squib. I saw drastically improved card change speeds, and I no longer had to go into each individual card’s photoshop file to edit things.

I also changed large portions of the rules and changed most of the cards to reflect this. I wanted a more streamlined version of the complex game we had. Previously, there was too much tracking each player had to do and things quickly became overcomplicated. In addition, I simplified card design and removed symbology, favoring more pronounced artwork. I've put the rules for this iteration below.
Download Rules V2
What I Learned
- Simple is best. Creating a complex game was fun, but the more elegant a solution is, the easier it is for players to play the game. You can still have a challenging game without an overcomplex ruleset, or ridiculous cards.
- Changing too much too fast results in a mess. You can easily lose site of the core of a game if you don’t focus on one section at a time. At one point, we changed goals, actions, and stars at the same time, and we had to roll back to regain our consistency.
- Players are the main inspiration. I often edited cards to work how players thought they did, rather than how I thought they should because it seemed more fun. It’s both interesting and incredibly fulfilling watching your idea grow organically.
In The Future
This has been one of my favorite projects so far, and I come back to Constellations every so often and do more work on it. I hope to ship it eventually, sooner rather than later, because I think I’m very close to nailing it.
The Full Credits
- Andrew Litfin
- David Foxworthy
- Carter Blalack
- And Myself!
Concerto
Beat 'Em Up with the Beat
Timespan: September - December 2016
Role: Designer, Programmer, Artist, Business
Tools and Languages: Unity 5.x, C#, Audacity
Project Overview
Concerto is a game in which you move and attack enemies to a beat. Your actions and movements create the music dynamically as you go, creating a song that is unique to you and your playstyle. It uses a combination of Platformer and Beat ‘Em Up mechanics to create engaging gameplay that you can hear.
I had the idea for Concerto when I was thinking about the difference between classical and modern music, and the conflict traditional and electronic musicians sometimes have. Originally, it was supposed to be just myself working on the project, but three other people wanted to work on it when they heard the idea. With their help, we refined Concerto into what it is. We decided to work in Unity for this project, because that is what the team was comfortable with.
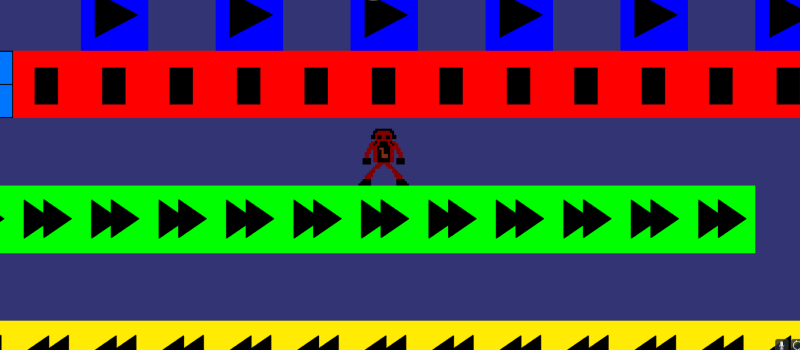
Sound Without Sound
One of the core design principles behind the game was that you had to be able to play the game without music. It sounds odd for a music game, but at RIT there is a large population of deaf and hard of hearing people, and I wanted to include them. Thinking about how to accomplish this, I stumbled across a bouncy pixel animation of a balloon, and I unconsciously found myself bobbing to its rhythm. I thought it was perfect, so I created my own, based on my original concept between classical and modern musicians. These turned out to be instrumental (pun intended) in refining the aesthetic and style of the game, in addition to how music would be played as you progressed.
Left: Red Beat Robot
Right: Beatoven


Once we had the idea to make sounds happen via player inputs, everything fell into place. We made environmental effects that played their own sounds in addition to player inputs to make the sound really feel like it was travelling through the environment. In addition, enemies had their own sounds, defiantly expressing themselves against your progress.
Custom Tools and Systems
We quickly found Unity to be lacking in several areas. Animation, sound, and level design never felt or looked quite right, and things seemed to be off beat often. Our solution was to make our own systems. Custom animation and a level editor that allowed pixel art to turn into levels assisted us in creating content rapidly and matching art to the beat. In addition, we created a tiered event system that would handle the beat, and things relying on the beat so that everything seemed to breathe with the same rhythm and maintain a bouncy feeling.
Below is a capture of the level editor. Pixel art is pulled in and objects are assigned to colors so that on loading the level, they are in the right place.

Sounds
Sounds became the easy part, ironically. Once we had a sound we were happy with, we would pitch shift it to different frequencies to create a sound palette. It was interesting to watch one sound become seven. The more sounds we made, the easier it was to diversify the palette, and to create a custom song. We used simple algorithms from vertical mixing to create a believable sound with them.
G3 Synth
A3 Synth
B3 Synth
What I Learned
- Music is a feeling. You can create sound in your head right now, try it. Once you have a rhythm, things flow. What is important is to keep that flow, or alter it to fit the current situation.
- Real sound shouldn’t come last. In any game, develop your sound alongside the mechanic or art for it. It helps keep a sense of cohesion and makes the process much easier.
- Use goal appropriate tools and software. If I could start over, I would have used Unreal for its sound engine and peripherals, or a middleware to handle some of the subsystems that are too slow in Unity. Picking the best tool for the job at the start is the best thing you can do, trust me. It’s much easier to get people to adapt to a tool than for a tool to adapt to a project.
The Full Credits
- Rose Flynn
- Peter McNamara
- Stefen Lewis
- And Myself!
Audio Visualizer
Song Seeing Eye
Timespan: February 2016 (2 Days)
Role: Designer and Programmer
Tools and Languages: JavaScript, Web Audio API
External Link to Visualizer: HERE
Project Overview
The audio visualizer was a class project a peer and I did together that I’m very proud of. The task we were given was to use a given audio API to create an audio visualizer with JavaScript and Canvas. Songs, the exact style, additional features, and anything else were mostly up to us.
Using An API
This was the first time I had ever used an API, and it was a wonderful experience. The API itself wasn’t fantastic, but it did show me how powerful they could be. With the API, my partner and I designed the UI to look like a DJ board, with switches and buttons that could be seen on one. In addition, this API handled things that we wouldn’t even have thought about until very late in the game, and its organization of audio data was spectacular. I look forward to working with other APIs in whatever language I work in from now on.

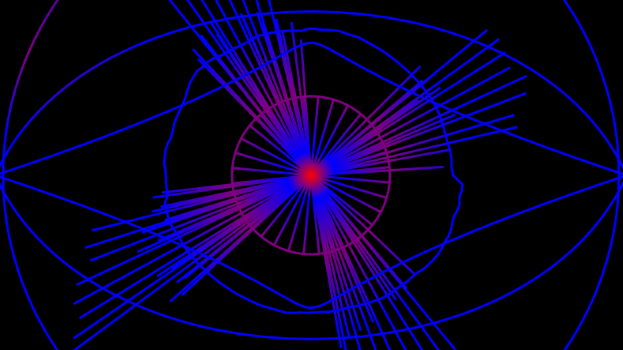
Styling Your Data
Once I had the data, it was up to me to style the data using the canvas and my own JavaScript. I decided to go for a look that resembled a speaker, but project requirements needed me to use a Bezier curve function. I decided to treat the speaker as an iris and used the curve to create an eyelid, which is shown below. With the UI, stylistic elements can be changed or turned off. The process or reading audio data and showing it on the screen with stylistic elements is largely similar to taking in data from a model and parsing it to show it in 3D, which is something I’ve done before. I’m very happy with the way this turned out, and I may make another in the future, using a different API.

What I Learned
- APIs rock! They make your job easier, and give you a toolbox of functionality to work with. I’ve done more research into APIs since and each one has helped me immensely. This project helpful in putting me down this road.
- Data parsing techniques are versatile. The same technique I used from 3D model data parsing translated with minor inconvenience to audio.
- There is a certain freedom to working within constraints. I’ve often heard it said that constraints drive creativity and this is a good example. While the use of a Bezier curve to make an eye is just one example, there were other times where this proved true as well, both as part of this project and in others. This project just helped me realized it.
The Full Credits
- Carter Blalack
- And Myself!